If you want to improve your body balance and strength, yoga can be a very effective form of exercise. In particular, standing postures in yoga are an excellent way to improve that ability while also providing a number of other advantages.
There are many benefits to adopting yoga into your daily practice, including increased flexibility, better sleep, better digestion, and support for mental health. Yoga is a type of exercise that doesn’t restrict you to a specific place. This is especially true for any standing yoga posture that the mat is optional.
All the standing yoga poses, such as mountain, tree, and chair, require anchoring one or both feet to the floor as a requirement. Standing yoga is an ancient practice that synchronizes your breath, body, and mind. Standing postures are techniques to align all these three via your connection to the earth.
Standing yoga postures are great for developing balance and stability as well as being a practical choice for stretching and strengthening throughout the day. Typically, these poses require a short amount of time, but they energize you greatly.
Here, in this article, we are going to explain the tips and practice methods of 14 best standing yoga poses to build balance and strength in the full body.
Tips for Standing Yoga Pose:
- To prevent strain or injury, keep your knee, foot, and ankle in the appropriate position.
- When support is necessary, especially during balancing poses, use a wall or chair as support.
- To maintain your balance, use a Drishti, or focus point. Use the padabandha yoga technique for leg stability.
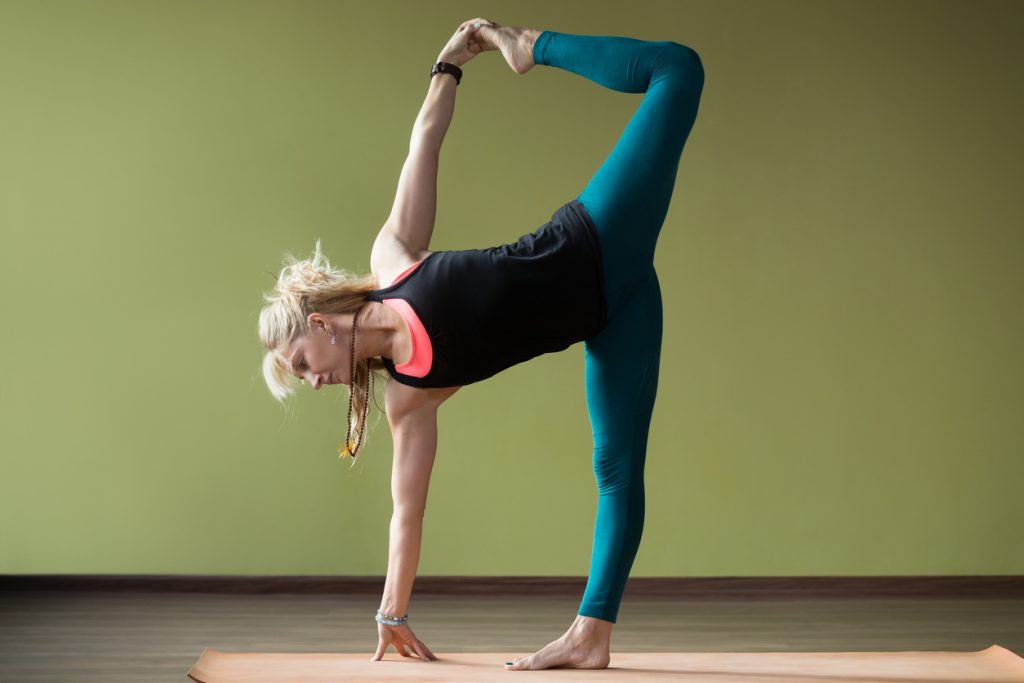
- Keep your breath deep and slow while practicing standing poses, especially for the more difficult ones.
- If your hamstrings are strong enough, modify the poses by bending your knees or by using a yoga strap.
Benefits of Standing Pose:
Standing positions provide numerous advantages. Standing poses like Mountain, Tree, and Warrior are particularly good for strengthening the legs, gluts, and core. Warrior 2 and arms raised, like a triangle, asana strengthens your chest and shoulders. Many of these poses increase flexibility in the upper legs and hip flexors.
Standing Yoga Poses for Beginners:
It is preferable to locate a certified yoga teacher who can show you how to position yourself for standing yoga poses. In the beginning, work on mountain poses first, as these are the basis for all other standing yoga poses. After mastering mountain poses, move to triangle and warrior poses to modify you. Regular practice and following our steps to adopt yoga pose will bring the finest and fastest results.
1. Tadasana (Mountain Pose):
- Stand tall and allow your shoulders to relax.
- Feel anchored as your head extends upward to the sky.
- Breathe deeply and raise your arms up in the air. Hold the pause for a couple of minutes.

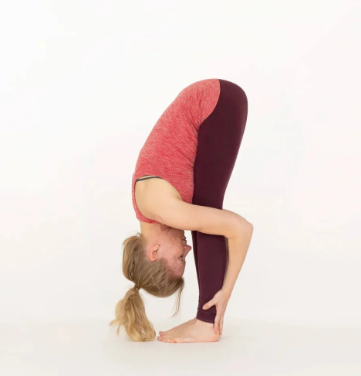
2. Uttanasana (Forward Fold):
- Take a tall stance and extend your arms upward.
- On exhalation, bend your body on your hips and fold the upper body forward.
- If necessary, bend your knees. Inhale deeply and modify your body into a half-lift.
- Inhale, and come into a half-lift.
- After that, breathe out and squat back down.
- Hold the pose for a while.
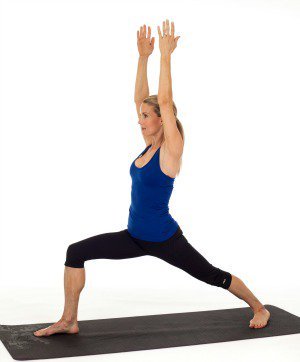
3. Virabhadrasana I (Warrior 1):
- Make sure your legs are at a 45-degree angle.
- Placing your left heel down on the floor, hinge on the ball of your left leg.
- Take a deep breath in; raise your arms while coming into Warrior 1.
- Ensure that both of your hips are facing the mat’s front.
- Lift your arms toward the sky while deepening your front knees.
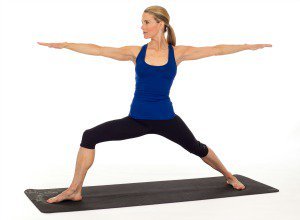
4. Virabhadrasana II (Warrior 2)
- Take a breath out. Extend your arms out straight, parallel to the ground.
- Pull your left hip back so that you can create a Warrior 2 position.
- Take a moment to feel how this differs from Warrior 1.
- Take a moment to notice that this is a different hip position than in Warrior I.
- Your hips are now towards the left side of your mat rather than the front.
- Verify that your hips are level.
- Align your right heel with your rear foot’s arch.
- Deepen your right knee. Hold some breath.
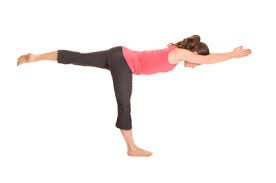
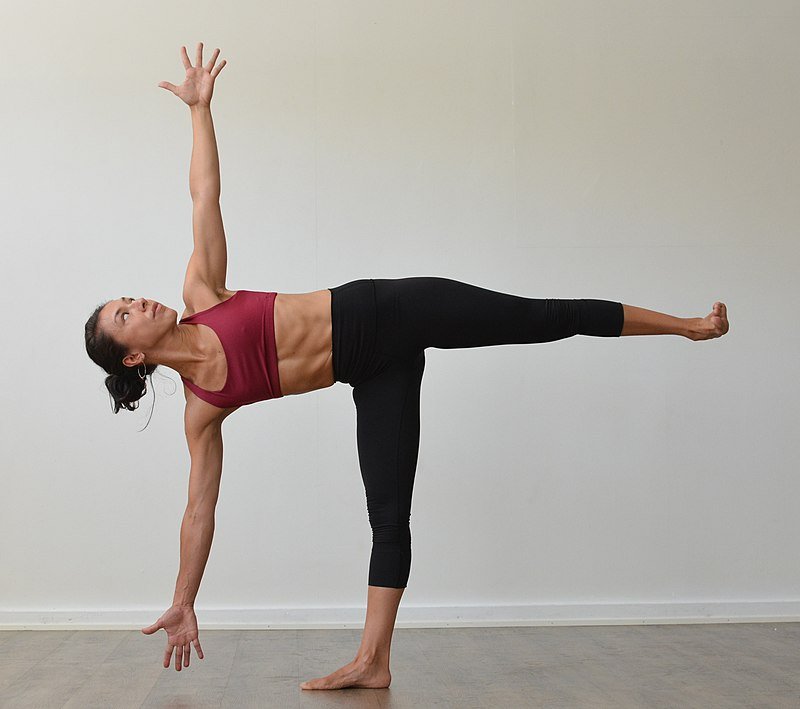
5. Virabhadrasana III (Warrior 3):
- From a warrior 1 stance, ground down via your front foot.
- Lift your toes off the floor and swing your arms in the air behind you.
- Create a straight line from toe to torso while lifting your leg up.
- Hold for a couple of breaths.
6. Viparita Virabhadrasana (Peaceful Warrior):
- From warrior 1, reach your left hand down behind you and lay it on the back of your left leg.
- Reaching your arm backward, line your biceps with air.
- Bend forward gently, looking toward your fingertips.
- Hold the pose for a while.
7. Paravrttatrikonasana (Triangle Twist):
- From a triangle pose, lower your left arm to the floor.
- Bend your torso and open it up to your right side.
- Raise your right arm up in the air and look at your fingertips.
- Hold for a few seconds.
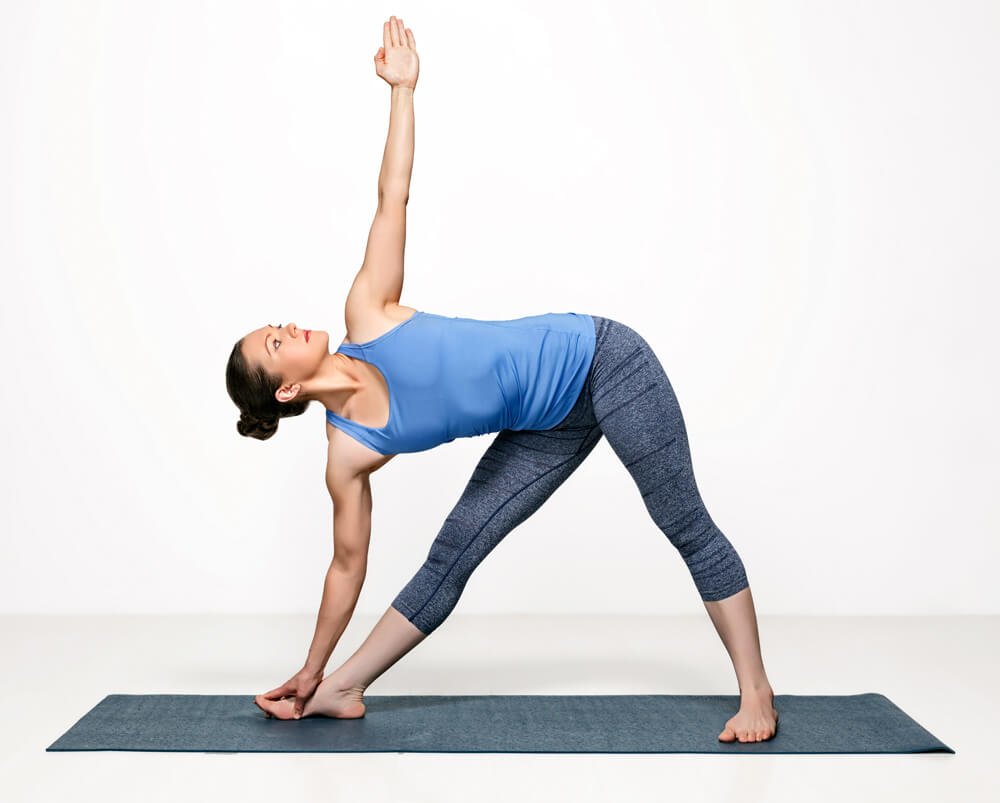
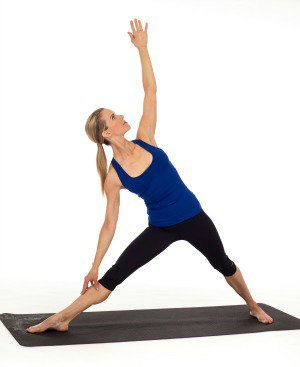
8. Triangle Pose (utthitatrikonasana):
- To enter Triangle Pose, bring your arms into a T and straighten your right leg.
- Place your right hand on your ankle, shin, or block to relax.
- Straighten your left arm above.
- Consider stacking your left hip over your right hip and your left shoulder over your right shoulder.
- Open your chest by twisting toward the ceiling.
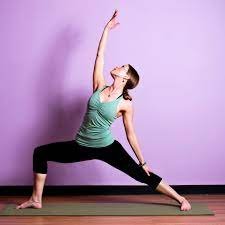
9. Ashta Chandrasana (Half Moon Pose):
- Extend your left leg backward and balance on one foot between your hands.
- Raise your left toes and use your front foot to anchor.
- Gradually lift up into a high lunge, keeping your arms above while staring in front of you.
10. Half Moon Pose with Cactus Arms (Ashta Chandrasana with Cactus Arms):
- Place your right foot between your hands and lift up into a high lunge position.
- Place your left toe on the ground.
- Raise your arms in the air and slowly deepen your elbows.
- Hold for seconds.
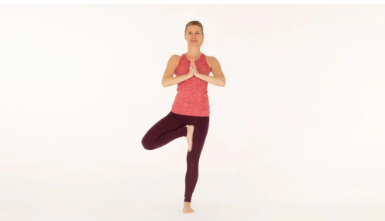
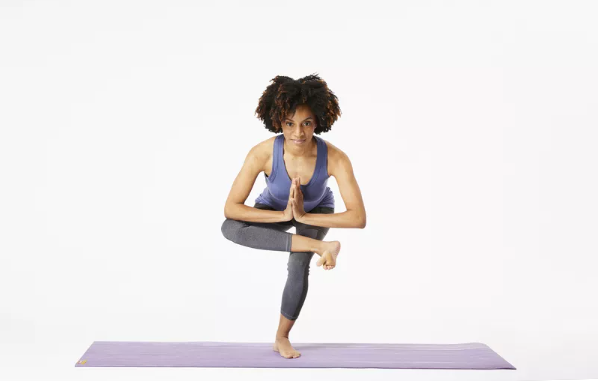
11. Tree Pose (vrksasana):
- From a standing position, ground down via your left foot.
- Twist your right knee and place your right foot on your left ankle or thigh.
- Straighten your arms in the air.
- Hold the pose for a while.
12. Figure 4 Chair Pose (ekapadautkatasana)
- Stand up on your mat. Sit down on your left leg.
- Raise your right knee and place your foot on the upper part of your leg.
- Bend your foot, pivot at your hips, and develop a chair pose.
- Repeat it on the other side.
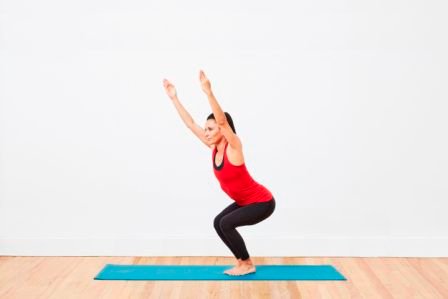
13. Chair Pose (utkatasana):
- Raise your arms to the sky from a standing stance.
- Slowly draw your hips back, as if you were sitting on a chair.
- Take a few deep breaths.
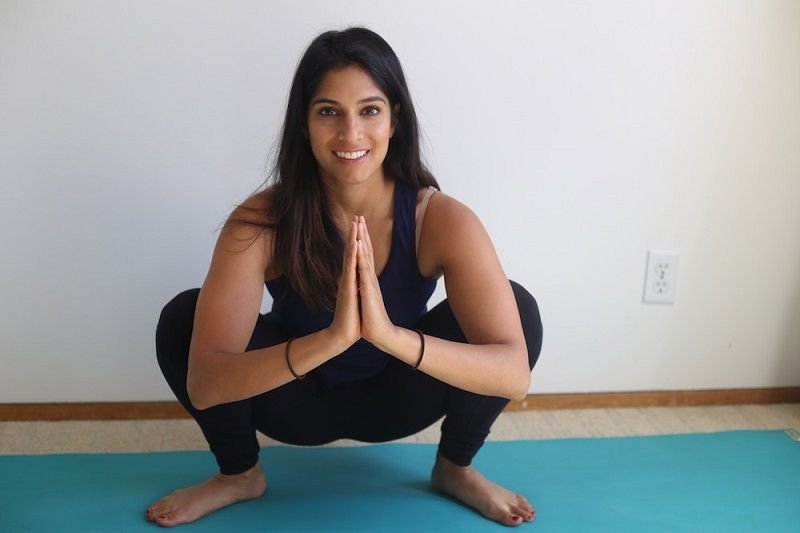
14. Yogi Squat (malasana):
- Lift your arms to the sky from a standing posture, then bend forward, lowering your hands to the ground.
- Make a gap between your feet’s hips-width.
- Flex your knees, hinge your toes out, and lower yourself into a squat.