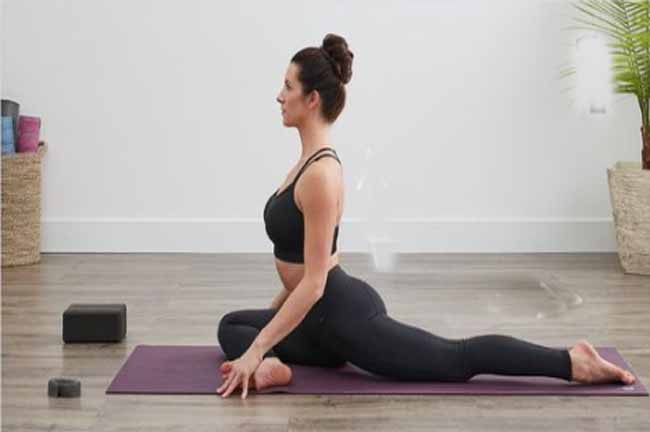
Pigeon yoga is a hip opener and a forward-bending pose. It has three main variations, each of which builds upon the previous one. You will most likely practice this version, which represents the initial level, in a yoga session. The Mermaid posture and One-Legged King Pigeon are the following two poses. Allow you some time to settle into the current pose before moving on to the next.
Targets Area: Hip
Equipment: Mat
Status: Intermediate
Pigeon Pose Benefits:
Downward-facing Pigeon Pose (EkaPadaRajakapotasana), also known as “the king of hip-opening asana,” is a warm-up for One-Legged King Pigeon Pose, which requires raising the back leg and bending the back into a backbend while reaching for the foot.
If you are a beginner, don’t worry. You can also enjoy Pigeon Yoga Pose because it requires no flexibility and no bending of the back.
The intense stretch in this pose stretches the psoas muscle of the back leg to rotate the one hip abductor. By bending the upper body on the mat, you feel a lovely release from the thighs, lower back, and glutes. Here are the things that are achievable in pigeon yoga pose:
- Strengthening and stretching of the hip flexors
- Enhance hip joint flexibility
- Develop general flexibility.
- Improve peristalsis movement (the passage of digested food through the digestive tract) and enhance the digestion procedure through lower abdomen exercises and gentle stretching.
- Reduces stress and improves mental health
- Open the Svadistahana (sacral chakra), which is linked to creativity, sexuality, and pleasure
- Reduce the pain in your back.
- Reduce sciatica discomfort.
- Prevent the negative consequences of a sedentary lifestyle
The bending of the knee in the pigeon pose stretches parts of the hips that become sore due to sitting at a desk for long periods. It is also a preparatory phase for more advanced poses such as Lotus Pose (Padmasana) and Lord of the Fish (Matsyendrasana).
How to Do Pigeon Pose: Step-by-Step Instructions.
There are various ways to get into the Pigeon pose, but the simplest is from Downward Facing Dog. If you are in favor of this way, you have to follow the same direction that begins from your hands and knees stance.
- Start from a Downward Facing Dog; raise your right leg into a Down Dog Split.
- With the bending of the right knee, bring that leg in front of you as if you were moving your step into a lunge.
- Rather than placing your foot on the floor as you do in a lunge, place your right knee on the ground in the outside of your right-hand direction.
- Make sure your right shin is parallel to the mat in front of you or maybe at an angle back toward your left hip.
- Allow your left knee to touch your mat. Ensure that your left leg is flat on the floor and that your leg’s foot is also pointing straight back.
- Apply pressure on your hips to feel grounding from all sides.
- If you need to be more comfortable in this pose, you can add a bolster (a folded blanket can work well) under the right side of your hip.
- If you are stable now, bend your torso forward over your right leg and place your forehead on the mat.
- If it is intense, place padding under the hip or back knee.
- Put your hands straight over your head on the floor.
- Take deep breaths with deep inhaling and exhaling.
- Hold the pose for three to five minutes.
- To come back, lift off your torso and draw your back leg towards your hips.
- Repeat the pose on the other side.
Common Mistakes of Pigeon Pose You May Repeat.
Save yourself from the following errors if you want to get the most out of this pigeon pose yoga.
Rotated Rear Leg:
Keep your back leg the natural way instead of rotating outward. The correct way to place your rear leg is to tuck your toes into the floor and raise your thigh to make sure your hips are square.
Hips Not Square:
Don’t apply the whole upper body pressure on the front knee. Keep your hips grounded on all sides and support them with a bolster or padding if needed.
Variations and Modifications:
By using the following strategies, you can get more out of the Pigeon pose. Whatever you try for your body, always keep a deeper stretch in mind.
The modification you require:
If you’re a beginner, you may go for a few extra steps and instructions to best fit your body and be more comfortable. Thoroughly check the hip of your bent leg; square it if it doesn’t tuck to the ground. Also, make sure the bolster is under the buttock of that leg. If you need to, use several blocks or rolled blankets. Distribute your weight equally on both hips and tuck them into the ground on all sides. Otherwise, you may stress your knee and may twist your sacrum, which is painful. If the lowering of your upper body is itching you, place a block under your forehead or forearms.
Being advanced and challenging:
If you have become a master of Pigeon Pose yoga, your next moves will be in Mermaid Pose or the full version of One-Legged King Pigeon Pose. In this part of the article, we are going to inform you about three different methods to explore Pigeon. The following strategies may be applied if your right knee is in front of you and your back leg is straight back behind you.
- Quad stretch: Bend your rear knee in an upward direction, raise your right hand towards the sky, and hold the left foot while reaching your left hand back.
- Mermaid pose: To get into this stance, bend your left knee in an upward direction. Reach for the rear leg with your left hand and hook your left leg around the top of the foot. Reach your right hand back to grasp the wrist of your left arm.
- One-Legged King Pigeon: While flexing your left knee towards the sky, raise your left hand and reach it back to hold the left foot from the left side. Once you hold the foot with your left hand, invite your right hand back to hold the right side of the foot while pointing the elbow upward.
How to Prepare for Pigeon Pose?
If you have tight hips and pelvis, get into the Eye of the Needle Pose to prepare yourself for the Pigeon yoga pose.
- Lie down on your back, bend your knees, place your feet on the floor, and relax your spine.
- Raise your one foot, bend its knee, and cross the ankle on the thigh of the other leg just above the knee.
- Lift your opposite leg and interlock your fingertips of both hands behind the thigh of this leg (this is the Eye of the Needle) and draw your right thigh toward your chest while exhaling.
- Hold the pose for three or five minutes and repeat it on the other side.
For the deeper hip opening, you can also try the One-Legged Chair pose, also known as Standing Figure-Four pose, to warm up for Pigeon.
Safety Measures and Instructions:
If you have any injuries to your knees and hips, don’t jump into this pose. Make sure that you are not feeling any type of stress on the knees. You have to feel the stretching of your hips and movement in the femur and pelvic region without getting pain.
The Bottom Line:
Pigeon Pose is a great stance to rotate your hip socket, and it stretches your hips and lower back. When you perform it in the right way, it develops flexibility in lower back muscles and flexors and also supports digestion as you bend forward.
Some people also believe it is a relief from sadness or mental stress. However, this pose is not for pregnant women or people who have chronic hip, knee, or lower back pain. Make a habit of talking with a healthcare professional whenever you try to start a new exercise.