If you are now adept at basic yoga and want to broaden your horizons with some challenging and advanced yoga poses. Any pose can be “tough” when the appropriate muscles are used. Some poses are undoubtedly more difficult than others. Here we are going to provide you with 10 advanced and more fun yoga poses with a step-by-step guide to beginner modification, holistic benefits, and personal tips.
Properly warming up your body is required before going to try any asana or pose. Go slow and steady while performing each move, adapting modifications as you go, and also listen to your body all the time. Only experienced or intermediate yogis can attempt these poses. If this is your first time on the mat, start with some simple yoga stretches.
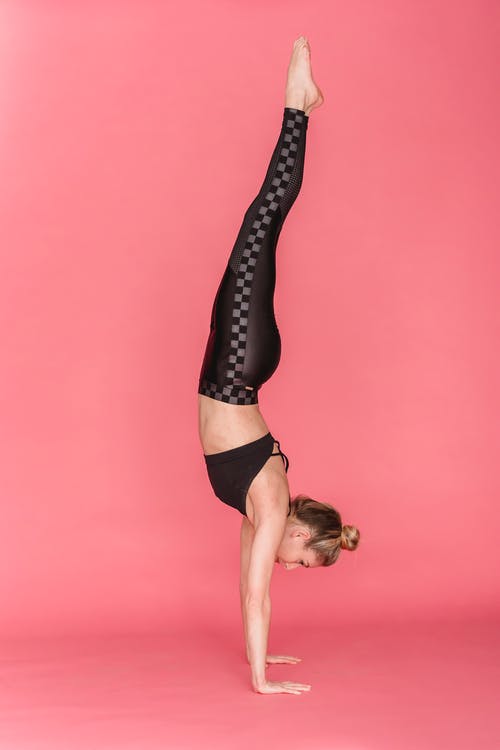
1. Adho Mukha Vrksasana (Handstand Pose):
How to Do:
This is most likely asana due to building confidence and getting empowered throughout its performing journey. To do this pose standing split, put your palms on the floor directly below your shoulder and look at the space between your hands. Place your standing foot directly beneath your hip while slightly bending the knee. Now, make control kick up by engaging your core. Straighten the elevated leg and flex your toes to make the move. Close your legs together such that the big toes are in contact and the heels are slightly apart.
The Benefits of Adho Mukha Vrksasana:
This advanced yoga pose may help you in:
- Building balance and stability
- Making your upper body stronger
- Boost core muscle
- Energizing the body and elevating the mood.
- Enhancing circulation
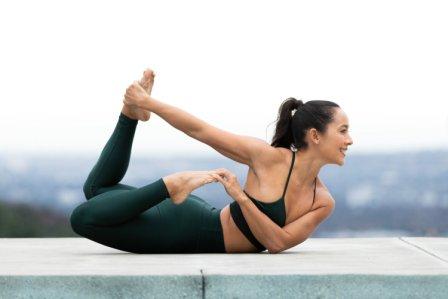
2. Dhanurasana (Twisted Floor Bow Pose):
How to Do:
This pose is very beneficial for your shoulders. Using the elbow as a kickstand is a key to this pose. Extend your right arm forward while in the sphinx position. Crawl over your left arm to the other side and come down on your elbow. To ensure this, make sure your elbow is below your shoulder. Reach your toes toward your back while bending your legs up and in. Using the right hand, reach back and grasp the left foot. Grab hold of the right toe with your left hand. As you raise your knee to help elevate your chest, head, and shoulders off the ground, kick your left foot into your right hand.
The Benefits of Dhanurasana:
It will assist you in:
- Opens up your shoulders and chest
- Increasing the power of back muscles
- Stretch your hip flexors and front body.
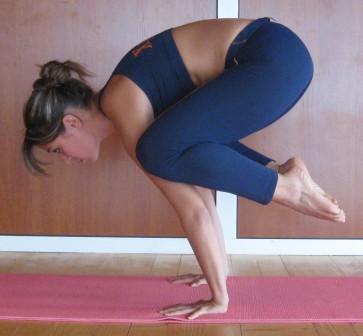
3. Bakasana (Crane Pose):
How to Do:
While sitting on the feet, put your hands on the mat directly below the shoulders. Slightly raise your pelvis, flex your elbows, and rotate your forearms in toward your midline. Near your armpit, gently press your knees against the triceps. Spread your shoulder blade and shift your weight forward on your hands to lift your feet off the ground. Straighten your arms and kick your heels towards your butt.
The Benefits of Bakasana:
You may:
- Empower your upper body
- Build your core strength
- Strengthen your hand’s muscles
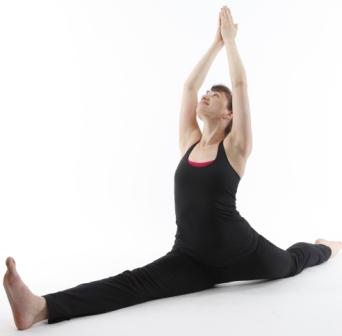
4. Hanumanasana (Split Pose):
From the half-monkey pose, position your fingertips on the floor directly below the shoulders by shifting your trunk up. Start sliding your back knee back and the front leg forward until your sit bone touches the ground. If your hip doesn’t touch the floor, take a block or bolster to prop it up. To make it more challenging, extend your arms up in front of your head.
Benefits of Hanumanasan:
- Strengthens your quads and hamstrings
- Build flexible hip
- Stretch the hip muscles
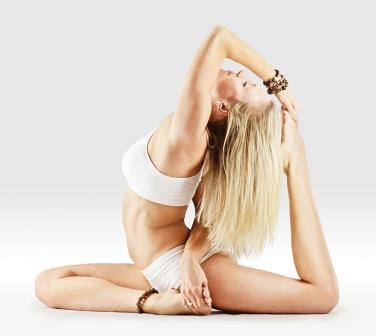
5. Eka Pada Rajakapotasana (One-Legged King Pigeon Pose):
How to Do:
Lift your one leg high in the air and curl it at the knee from a downward-facing dog position. Move forward and lay your elevated leg behind your hands on the mat, putting your shin on the ground perpendicular to your body. Make sure your rear leg is extended behind you in a straight line, untuck the back toes and drop yourself to the mat. Now curl your straight leg to a 90-degree angle while squaring off your hips. Look toward the sky and raise your arms high in the air and reach backward for your foot.
Benifits of Eka Pada Rajakapotasana:
- It opens up your upper body
- It Stretches your hip flexors, groin, thighs, neck, and abdomen.
- Boost the abdominal organs
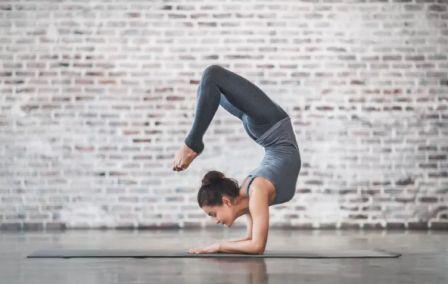
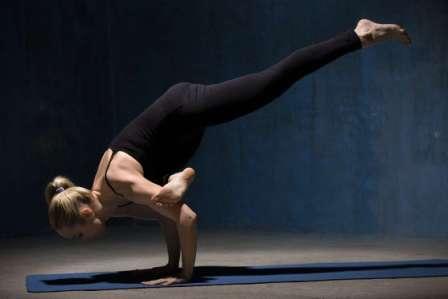
6. Vrschikasana B (Scorpion Handstand):
How to Do:
Close your legs together to start a handstand advanced yoga pose. While keeping your legs straight in front of you, bend one knee. Generate a small backbend by lowering your chest, lifting your head back, and moving the toes of your bent leg toward your head. Now bring your leg closer and bend the straight leg.
Benefits of Vrschikasana B:
- Spread your heart and open up your front body
- Improve deep core strength
- Builds stability and strengthens your body
- Makes balance and coordination of the whole body
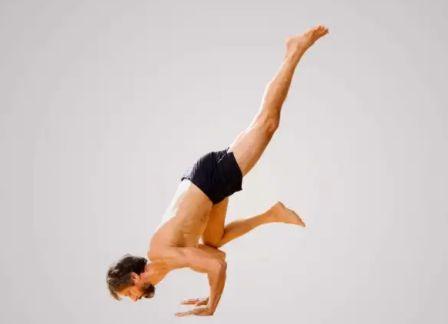
7. Eka Pada Bakasana (One-Legged Crow Pose):
How to Do:
Point your toes and pull your heels in towards your butt in the crow pose (similar to the crane but with bent elbows), engaging your hamstrings. Open up your shoulder blades and keep your navel in. Bring your right knee up to your chest, and start shifting your weight forward while extending and straightening your right leg at a 90-degree angle upwards.
Benefits of Crow Pose:
- It strengthens the shoulders, core, and wrist
- Builds balance
- Energizes your body
8. Eka Pada Galavasana (Flying Pigeon Pose):
How to Do:
Stand up and put your right ankle over your left knee in a figure four position. Fix your right foot. Without moving your weight, wrap the right foot around your left arm and push your right shin against the top of your triceps. Looking at the mat elevate onto the ball of the back foot. Engaging your core bend your elbow and move forward. Raise your leg in the air towards the sky and keep it straight throughout.
Benefits of Eka Pada Galavasana:
- Stretch your hips.
- It opens up your chest and core.
- It makes your balance good.
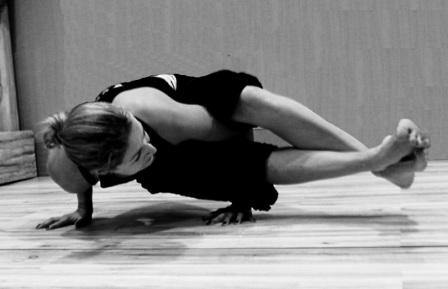
9. Astavakrasana (Eight-Angle Pose):
How to Do:
Bend one leg while sitting and grasp its pinky side with the opposite hand. Raise your other leg and reach your free arm below the leg. Put the knee over the shoulder. Place your hands shoulder-distance apart on the mat close to your hips while hugging the raised leg in toward the midline. Lift your hips off the floor while remaining balanced on your hands. Pull out the bottom leg and shift the hip back to raise the legs. To secure the pose, cross your lower ankle over your upper ankle.
Benefits of Astavakrasana:
- It strengthens the core.
- increases focus and balance.
- Strengthens the wrist
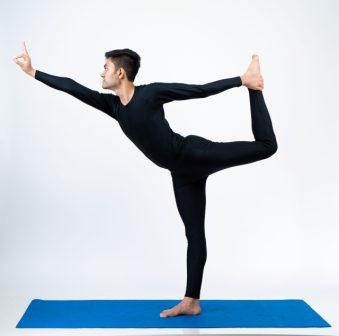
10. Natarajasana (King Dancer Pose):
How to Do:
from a standing position. Pull the left leg up and in towards your chest and start to root down. To activate the quadriceps in the standing leg and contract your glutes to support the pelvis, lift the kneecap. With the same side arm, grab your left leg’s ankle. Bring the left knee back to meet the standing leg, with the foot pointing in the direction of your butt. Reach for your left foot with your free arm to grab the left foot. Kick your foot up as you push your chest forward and straighten your standing leg.
Benefits of Natarajasana:
- Hips, shoulders, and chest are stretched.
- It strengthens ankle muscles and legs.
- Improves balance