Did you enjoy sound sleep or dog-sleep at night? Or, do you awake fresh in the morning? Did you feel sleepy and exhausted while cursing your alarm in the morning? If your answers are not in your favor, don’t bother; we are here. When you’re rushing from one duty to the next and one commitment to the next in search of a lousy night’s sleep, this situation makes you feel like you’re going around in circles. You want to get up with a fresh feeling, but you’re still so tired and stressed that even an inbox full of urgent emails can’t weigh down your burden. Practicing restorative yoga poses may help you in that matter, along with many other benefits as well. Everyone can do restorative yoga poses.
It’s ridiculous that most people avoid restorative yoga because they consider it “no pain, no gain. They believe in sweat-making and heart-pumping exercises. Certainly, there are also some who swear by this.
Generally, restorative yoga offers very gentle, relaxed, and peaceful poses. Additionally, it can result in profound relaxation, lowered blood pressure, and a looser spine and hips (which is more crucial than you think).
Wait, wait….
Don’t hop to restorative yoga practice too early. Let us help you to decide first…
When You Need Restorative Yoga Poses
- You struggle to go to peaceful sleep at night.
- Your body aches if you make a rapid movement.
- Your morning is not refreshed.
- Sleepy and exhausted this morning.
- You feel that your rage at useless things is getting a bit out of control lately.
- You are tired of all the daily routine.
- You can’t stop unwanted thoughts in your brain.
- You can’t avoid yourself from multitasking even when you shouldn’t.
- Despite having an injury, you choose to “push through” it rather than allow it to heal.
- You desire a little less confusion in your life.
What is Restorative Yoga?
Generally, restorative yoga consists of five to six poses only, but these are supported with props that allow you to feel calm and relaxed while stretching your body. All poses require 5 to 10 minutes, but what you do is breathe deeply while practicing. Restorative yoga poses have seated forward folds, simple and easy twists, and seated forward folds.
If you have joined a restorative yoga session, your teacher will adjust your posture and help you go deeper into the pose. He will show you how your body can move comfortably in a way that you normally don’t move in that way.
It challenges the mind that is always ready and wandering to be stagnant and ok without doing anything. It also challenges your body when you sit in a pose without any movement for a long time. This may not be great for a big challenge. Move ahead and practice it; you will see that it is not a piece of cake as it seems.
The Benefits of Restorative Yoga:
Restorative practice has proven to have many health benefits as well. Studies show that this plays a significant role in the reduction of blood pressure and also has the ability to calm stress.
The majority of people maintains high-intensity lifestyles and continuously tries to balance a variety of tasks. This is far more than what their bodies can do and may lead them to deal with aches, pains, and illnesses daily.
Perhaps the activity that allows you to experience the state of “not-doing” is the most useful for you. Of course, you don’t have to stop doing the heart-pounding workouts that help your body and mind feel good, but attempting to fit in a slower activity has never done anyone any harm.
You will undoubtedly experience the relaxing effects of these gentle poses, and you might discover that you desire more of this style of yoga.
Here are some of the best restorative yoga positions with descriptions that you should try right away.
Bests Restorative Yoga Poses:
The moderately practiced yoga sequence that targets the connective tissue can be a pleasant treat for your body and your muscles. Sure, it might help you relax, but it also helps to open up the connective tissue in your pelvis and hamstrings so you can master those incredibly challenging postures.
Here are some of our restorative sequences that might help you to start:
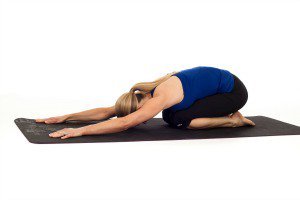
1. Child’s Pose (Balsana):
- Kneel down on your mat.
- Bend your upper body forward until your belly lies comfortably between your forehead and thighs on the mat.
- Straighten your arms next to your body.
- You can also add a bolster between your legs before lying down. Then, bend onto the bolster that gives you a feeling like a baby in the womb.
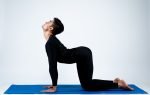
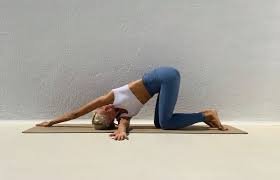
2. Upavistha Bitilasana Marjaryasana (Sitting Cat Cow)
- To practice this, sit with cross-legged and place your hands on your knees.
- Straighten your torso up and feel that your seat bones are firmly anchored to the ground.
- As you inhale, slightly lean forward and gently look up for a slight backbend.
- Upon exhaling, slightly round your back and hold your knees with your arms and look down at your navel.
- Hold the pose and repeat it several times.
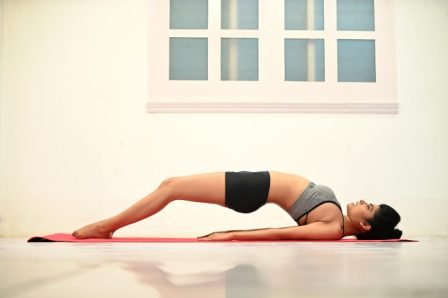
3. Supported Bridge Pose (Setu Bandha Sarvangasana)
- For this pose, lie on your back with bent knees.
- Keep your feet as far away from your buttocks as your fingertips can reach.
- Add a yoga block under the sacrum and cactus your arms or place them on your belly.
- Hold the pose for 3-5 minutes and take a deep breath.
- You can also add a higher level block to maintain your body on a long thin edge.
4. Supta Baddha Konasana (Reclining Bound Angle Pose)
- To get into this pose, lie down on your back.
- Bend your knees and bring your feet as close to your buttocks as you can.
- Extend the knee outside and allow your soles to touch the knees.
- Grab bolsters and place them under both your knees so that you can feel less intense due to stretch in inner thighs.
- Place your arms on your belly or open them wide.
- Stay here for at least five minutes and do gentle breathing.

5.Parsva Balasana (Thread the Needle Pose)
- Start on all fours. Align your wrists, shoulders, and elbows.
- While engaging the core, keep your back flat and place your knees directly under the hips.
- If you need to, double up your mat under the knees.
- Twist your torso slightly and raise your right arm in the air. Next, flex your elbow and place the right arm just under the left one so that the right shoulder and temple come down on the floor.
- Take a few breaths here and then repeat the same pose on the other side.
- For variations, you can move your right arm back behind until you grasp or hold the inner thigh. Don’t be bothered if you can’t reach there; you can just place your arm behind you.
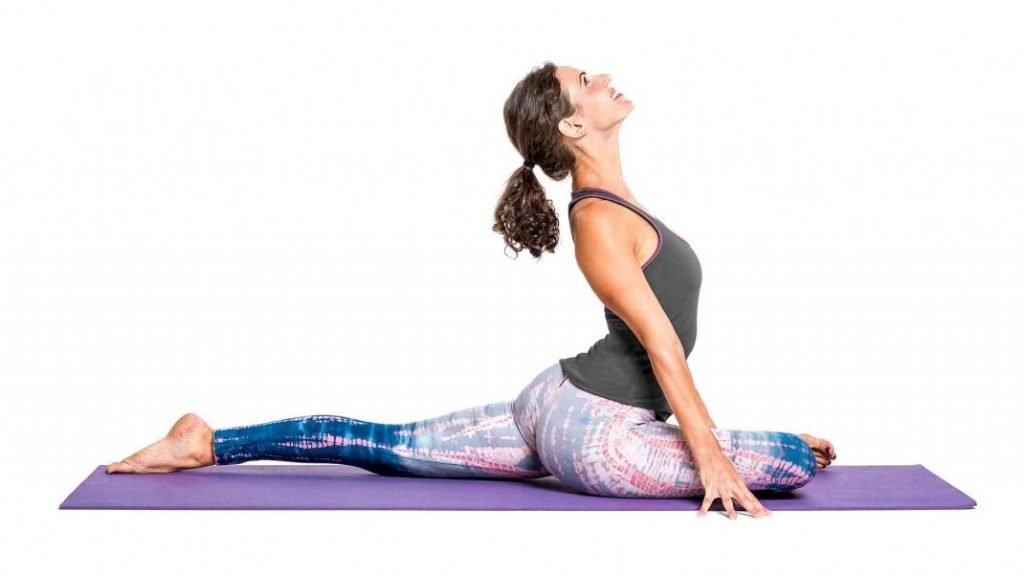
6. Eka Pada Rajakapotasana (Sleeping Pigeon Pose)
- If you are suffering from sciatica, this pose could be best for you.
- To come into sleep pigeon pose, come on all fours.
- Lift off your right leg and place your shin on the mat, while extending your knee to the right a little. Bring your foot closer to your pelvis.
- Ensure that your back leg is straightly extended behind you.
- Place a bolster under the right buttock and also place the two bolsters inside of the right lend and gently bend forward and straighten your hands in front of your head.
- Take great care that you are inhaling and exhaling at equal length.
- Hold the pose for five minutes and then repeat the pose on the other side.
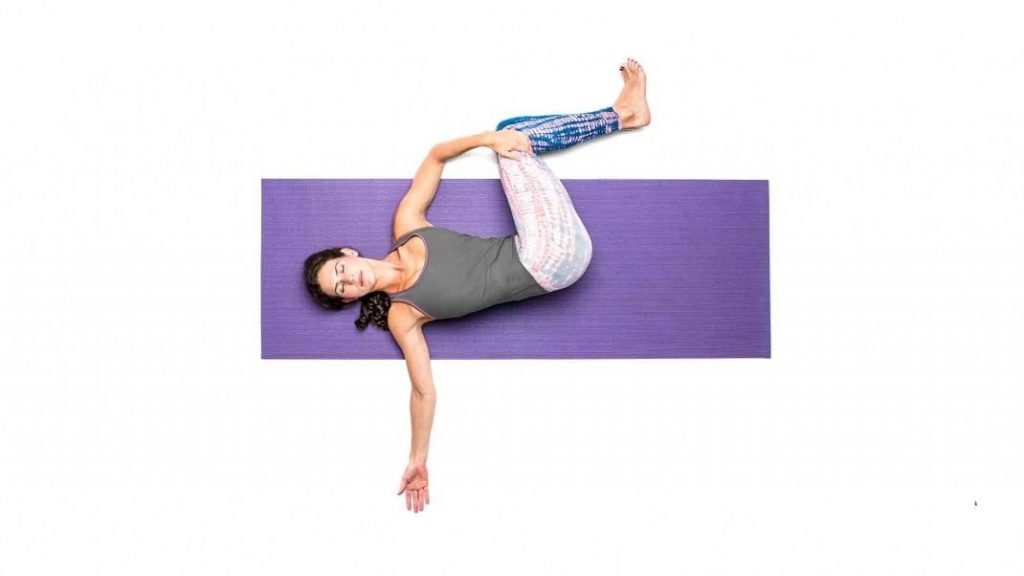
7. Supine Spinal Twist (Jathara Parivartanasana)
- To practice this pose, lie down on your back on the mat.
- Draw your right knee up to your trunk.
- Put your left hand on the right knee and draw the knee over the body and place it on the left side with a gentle twist of the body.
- For comfort, add a bolster under the knee, and extend your arms on the sides.
- Take a deep breath and hold the pose for a few seconds.
- Repeat the pose on the other leg.
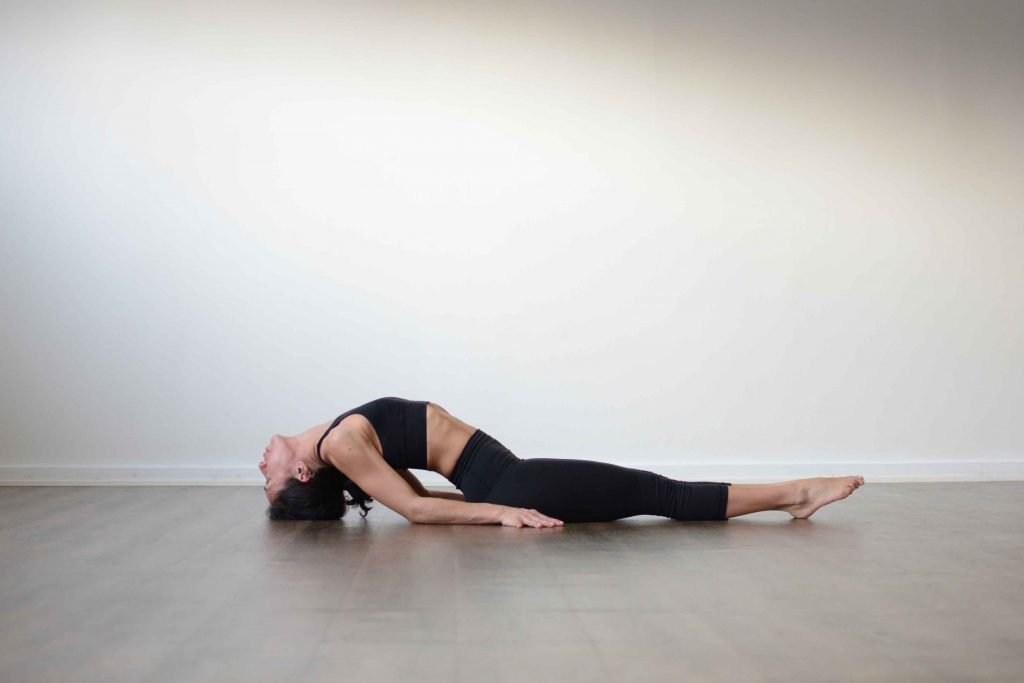
8. Matsyasana (Supported Fish Pose)
- Lie down on your back and add a long pillow under your back in such a way that the short edge of the bolster must touch your lower back.
- Keep your legs straight and drop your arms on the floor with palms facing upwards.
- Stay here as long as you can and take a deep breath.